How to organise a Warcry tournament (on Wartally)
Anyone can run a tournament on Wartally. Be it a small gathering of friends or a major store event; It works the same.
In the following, we'll cover the various features for you, as a TO (Tournament Organiser).
- Create a tournament
- Tournament page
- Adding participants
- Votes
- Battle plans
- Running the tournament
- TTS integration
Create a tournament
To create a tournament, you first need to create an account and be logged in. Then, from the front page, click "Find tournaments". This will take you to the page for publicly listed tournaments. On the right side, find the "Action" drop down; Click it and select the "Create new tournament" option.
You should now be on a page titled "New tournament". On the page are a number of fields that you can fill in. Some are required, but many are optional. Once you have filled them in, scroll to the bottom of the page and click on the button labeled "Create tournament".
We'll go through each of the available options below.
Format
The very first thing you need to decide is on the tournament format. By far, the most common format for running a regular warcry tournament should be the Swiss. This will have everybody play the same number of games and will automatically match players with similar strength against each other. The remainder of this guide will assume that's what you pick, but most of this guide applies equally to the other formats.
Basics
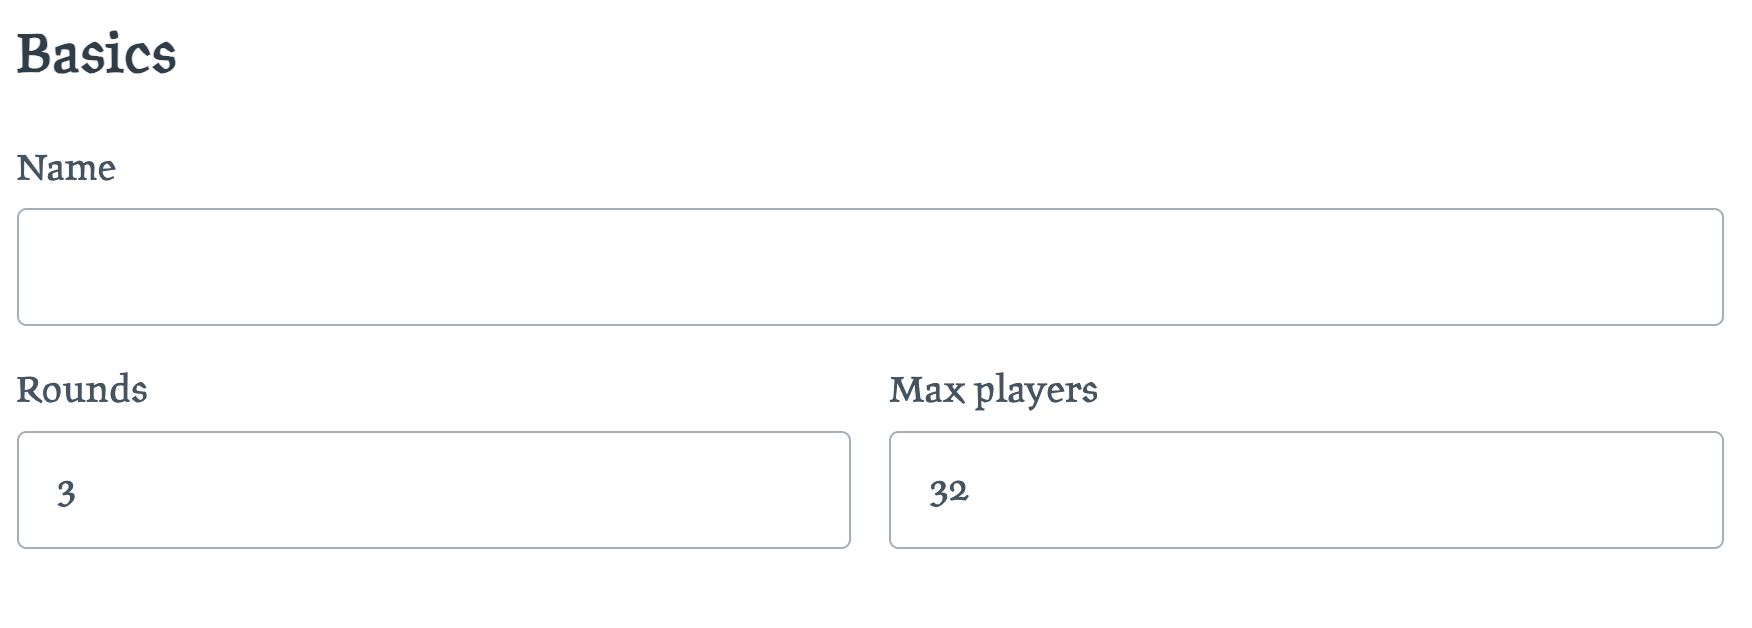
The next setion is labeled "Basics". "Name" is the name that is used to present your tournament in listings and on the tournament page it self. Pick something descriptive. "Rounds" is a number and specifies how many rounds of matches your tournament runs for. Typical values are between 3..5. "Max players" is optional, but if you input a number here, it will not be possible to signup once that number is met.
If you run multiple tournaments, you can arrange them into a series. To do so, you must first create the series. If you have done this, there will be a dropdown under the "Basics" section to select a series. By associating your tournament with a series, it will list under tournaments for that series and results will be federated into an overall champion across events.
Metadata
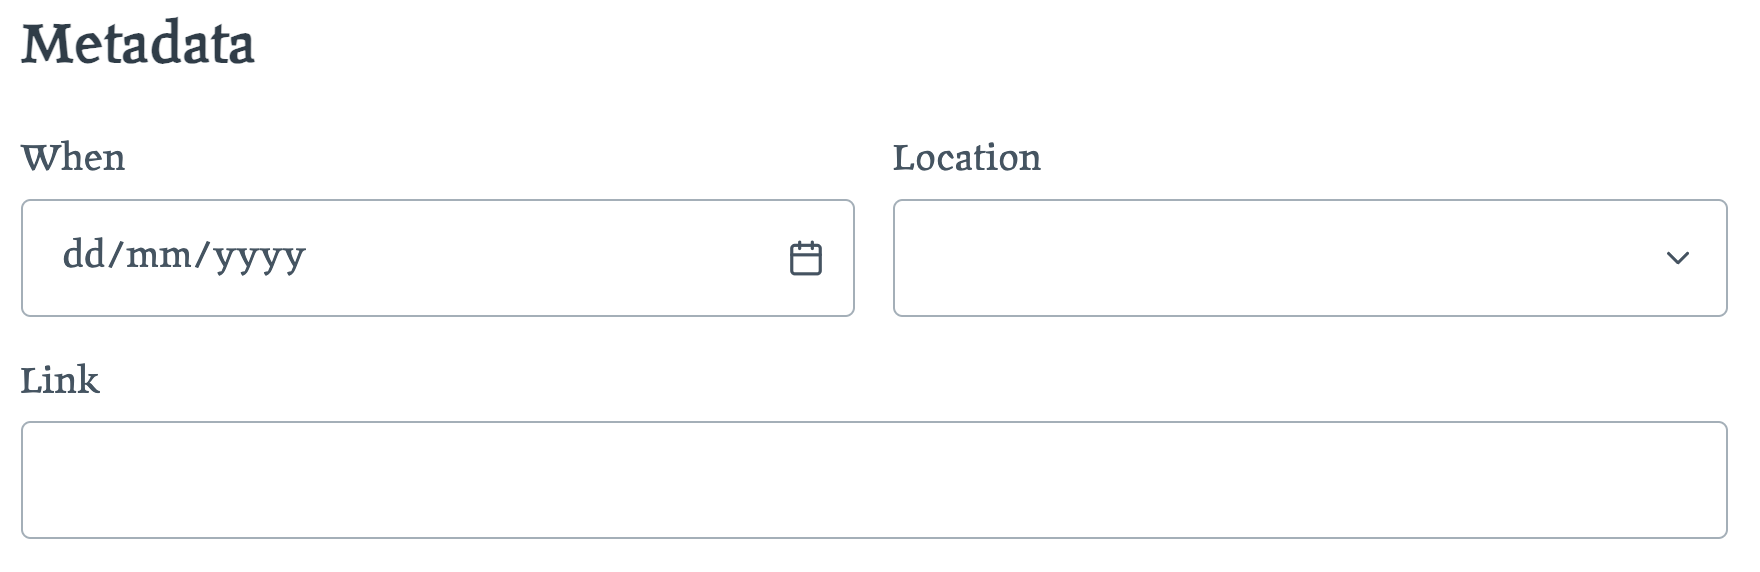
The next section contains three optional fields. "When" can be used to specify the date of your event. "Location" is used for the location (country) where it takes place. You can also select "Online" for TTS and similar events. The field "Link" can contain a link to more information about the event. This could be a link to a Facebook page, or a pdf, Google doc or similar.
Permissions

For "Access" you have the choice between Private, Hidden and Public. This controls who can find and access your tournament. Initially Private will be selected; This is the most restrictive and essentially means that only you can see the tournament. This is good for testing and for configuring everything, before making it available to the public. You can later change it to either Hidden or Public. The difference between these being that Public events are listed on the "Tournaments" page, whereas Hidden events are not. Anyone can still access a Hidden tournament, but you will have to share a link for it. This is recommended for private events.
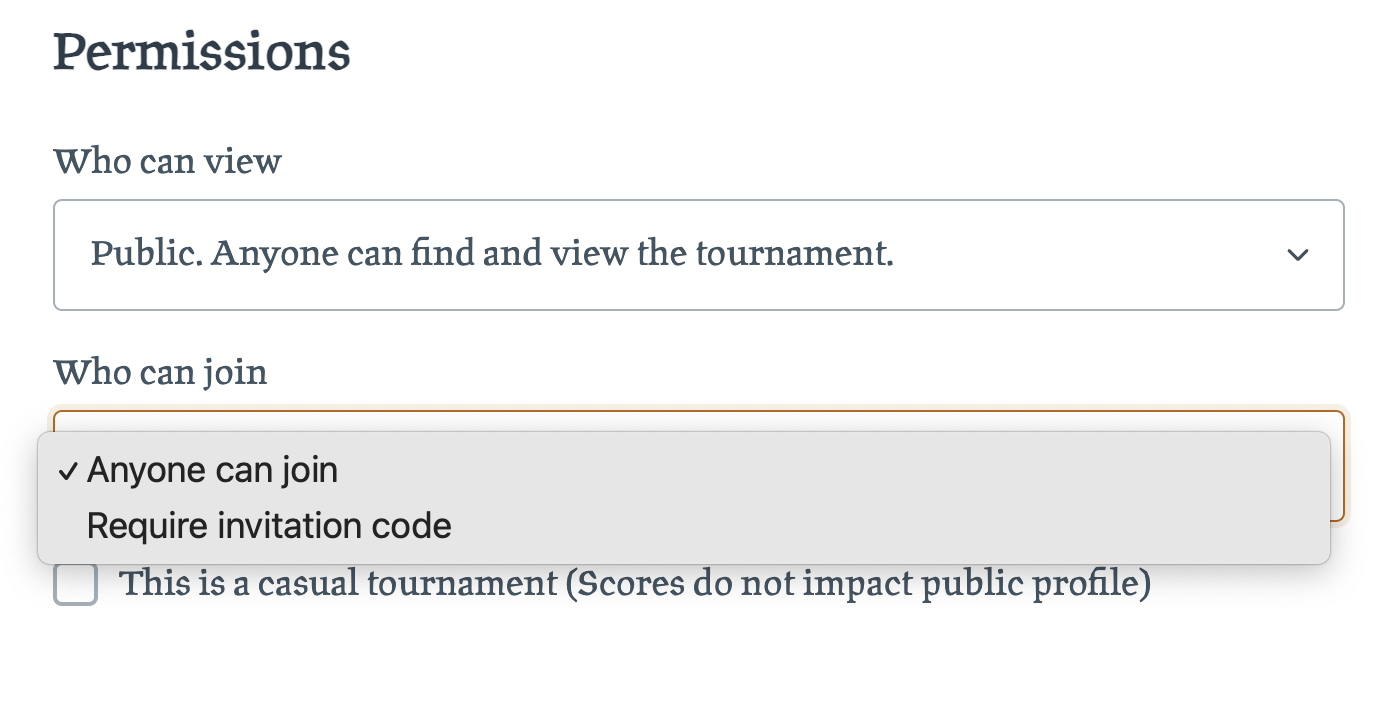
Below you can select "Who can join". By default, anyone who has access to view the tournament can also join it. You can restrict this to "Require invitation code". By selecting this, participants will need to get an invitation-code, before they can sign up. You can create the invitations after initial setup.
Results from public tournaments are summed up on users personal profile page. If your tournament is narrative or otherwise a "casual" event, you may not want it to count against the total. You can check the checkbox for "This is a casual tournament", in which case the results will not be counted.
Runtime control
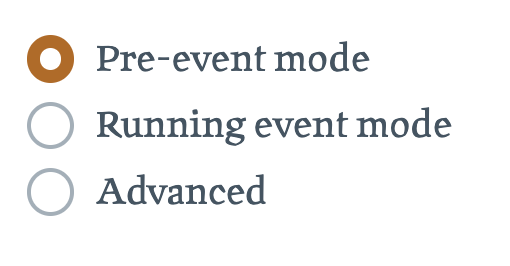
The runtime settings is used to manage settings that are specifically relevant at different stages of your tournament. Most users should have their tournament set to "Pre-event mode" until the event is started, at which point it should be changed to "Running event mode". In "Pre-event mode" rosters are hidden to the public. In "Running event mode" rosters become locked for editing and simultaneously public. New signups are also not possible now.
Grudges and Truces

Under the label "Misc features" is currently a single setting, for "Grudges and Truces". If you enable this feature, participants will be able to enter into either a truce or a grudge match with one or more participants. Both parties will have to agree for such an agreement to form. In both cases, they affect the pairings for round 1. If a grudge match is agreed, the two participants will always pair up against each other on this round. Conversely, if a truce is agreed to, the pairings will attempt to not match them. This is often used by participants travelling together to a big event. Other systems might some times handle the same thing through the concept of "Teams".
Roster constraints
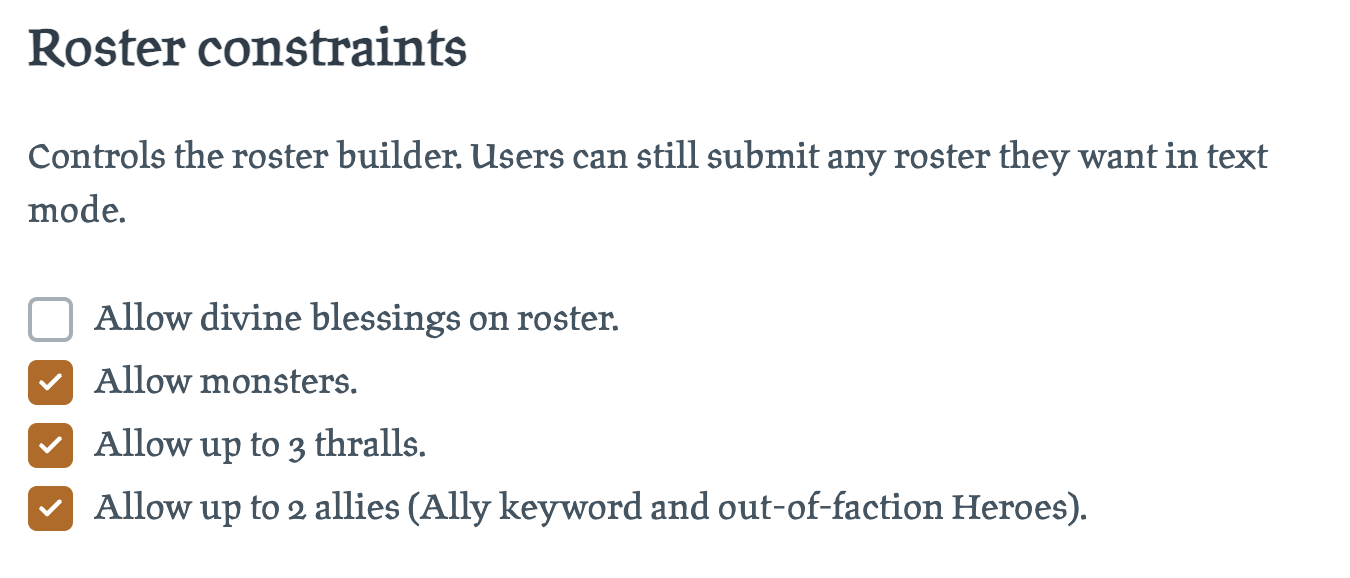
Roster constraints allows you to control the rules for warband rosters. These limits will only be enforced in the advanced roster builder; Players will still be able to submit any roster in text mode, even if invalid. However, by configuring the builder, you give participants an easy way to verify the validity of their lists.
Scoring

The "Scoring" section configures how scoring works for your tournament. First you need to pick a "scorecard type". This is the primary outcomes for a match - e.g. will you simply mark the match as Win/Draw/Loss or will you use the more common Major/Minor distinction. There is also a third option, "Custom". If you pick this, the scoring page will simply feature a numeric input field. You can use this if you have a custom scoring scheme, that doesn't fit the standard systems. Although, if you pick one of the standard scorecards, the scoring page will present a bit nicer, with less room for user error, so keep that in mind.
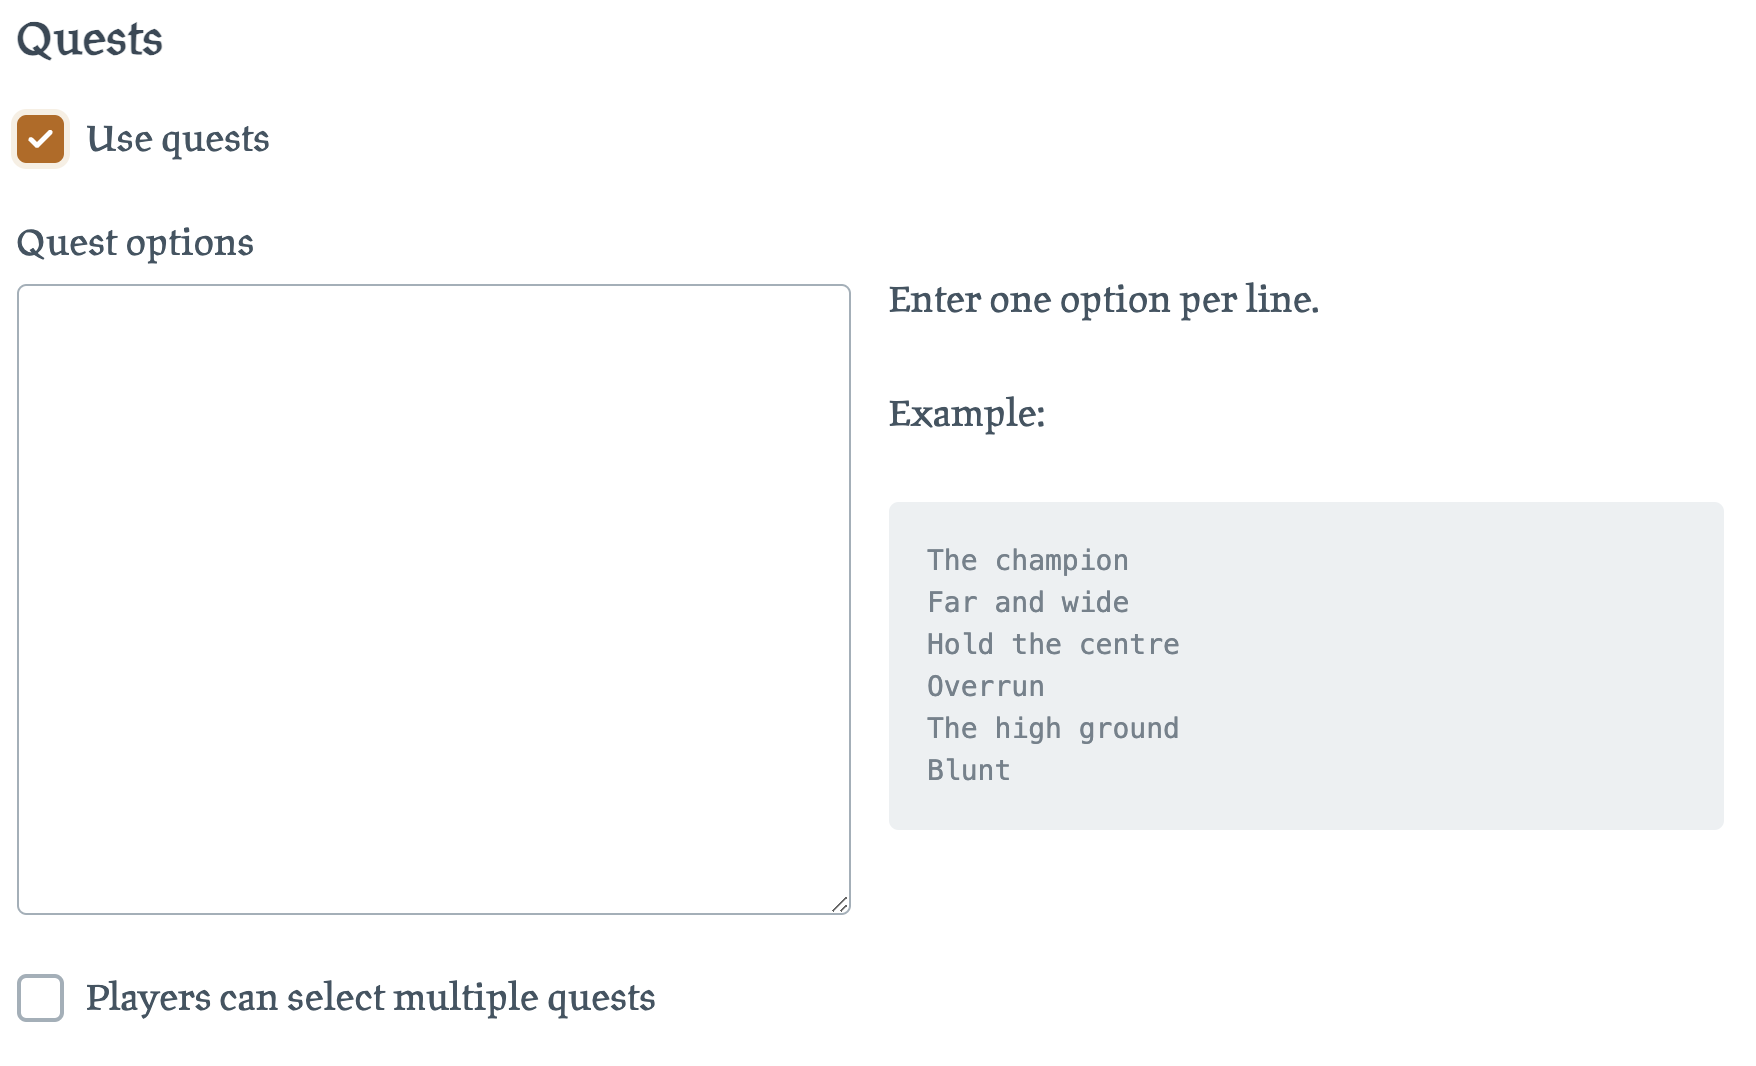
You can optionally enable "Quests". These are secondary objectives that can be achieved. A fulfilled quest will score +1 points on top of the main score. So with a 5/3/1 scorecard, players could get up to 6 points for a win + fulfilled quest. You can also select "Players can select multiple quests", in which case the participants can meet multiple quests, each awarding +1 point. You will get a text field to enter the quests into; Simply put one quest per line.
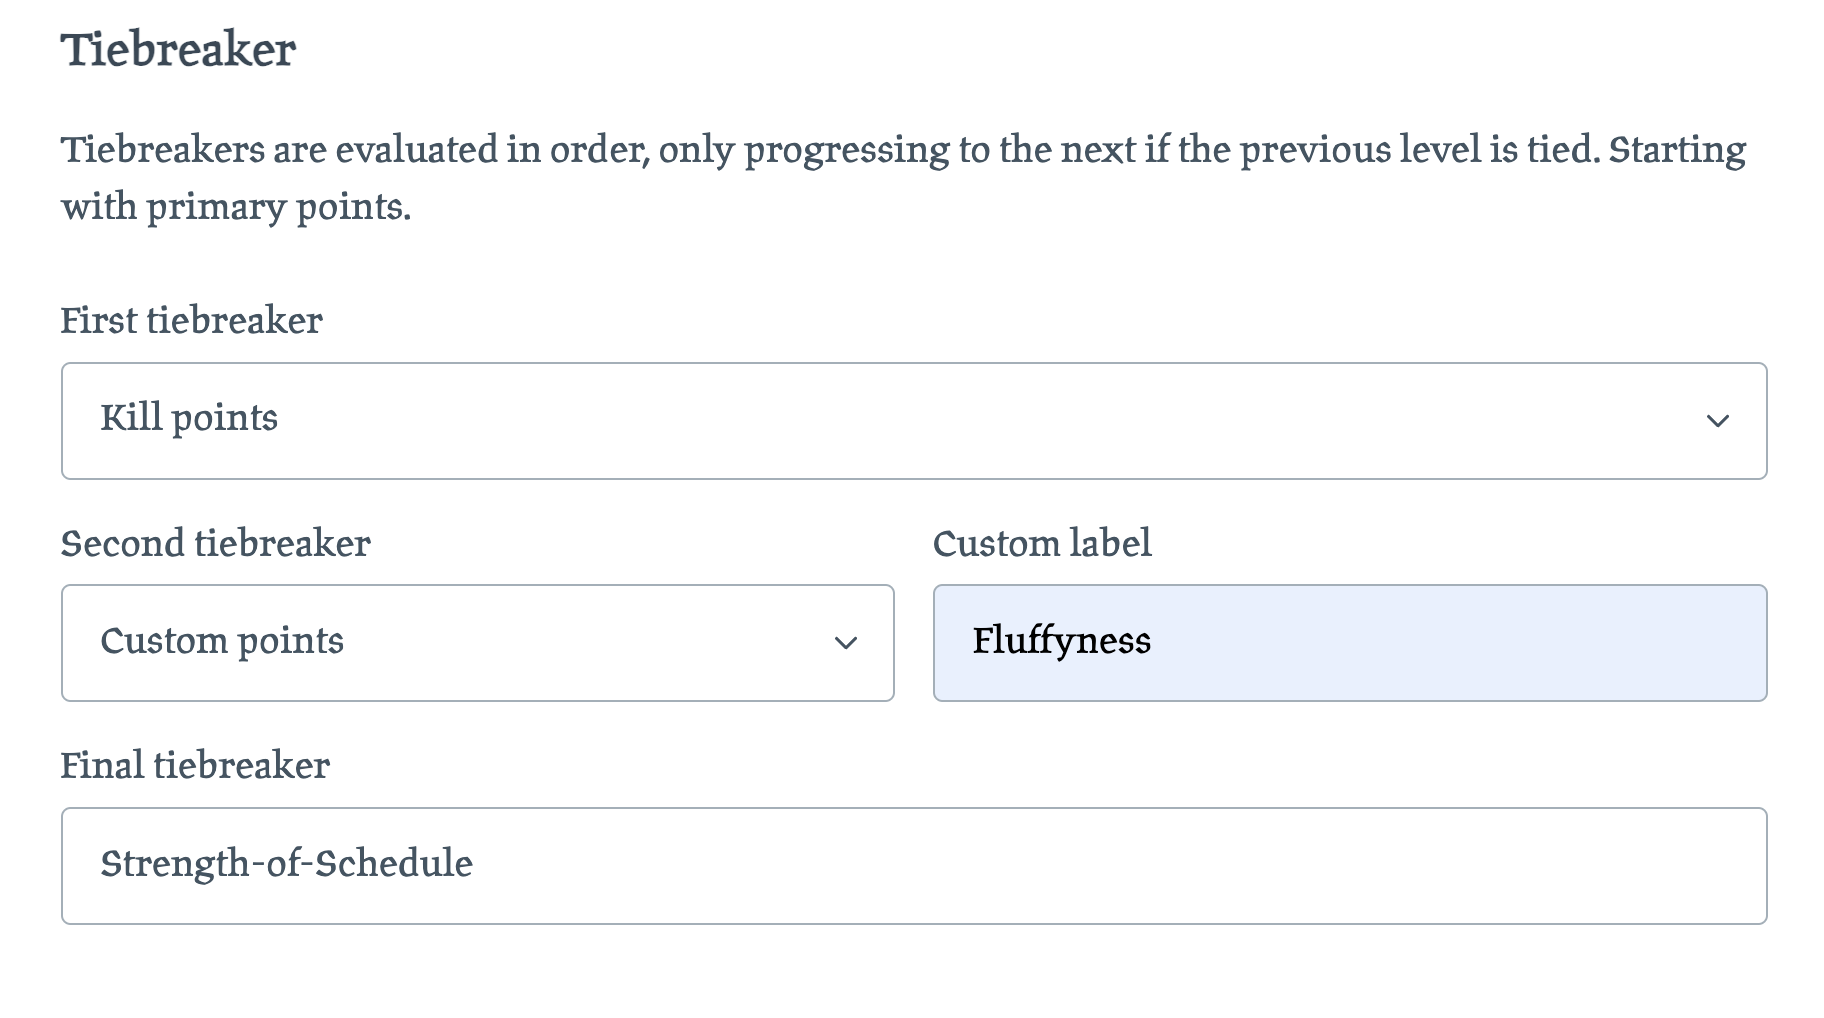
Next, you configure the tiebreakers. If players are tied on the primary score, you need a way to resolve it. You can have up to two types of points, that are evaluated one after the other. For Warcry, Kill points or Victory points are the most common, but you could add a custom metric if you wish. If the players are still tied, the final tiebreaker will always be done using the Strength of Schedule scheme.
If you want to go directly to SoS, just leave out both points metrics.
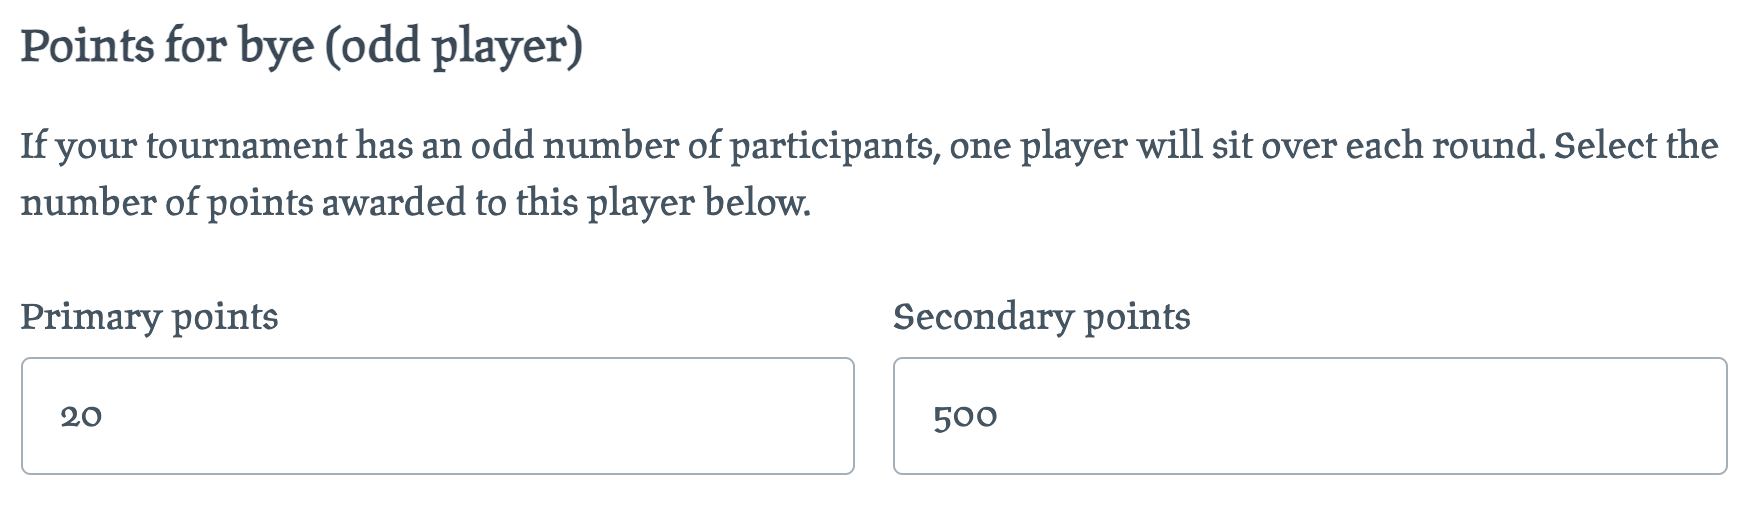
Finally, you can select the number of points awarded for a "bye". In case you aren't accustomed to the parlance, a "bye" is when there is an odd number of participants and one player has to sit over for a round. To be fair, this player will usually be awarded points as if they had won that round. As such, the points should be equal to the max number of points possible per the settings above. Wartally doesn't calculate this automatically, so you will have to provide sane numbers.
Tournament page
Once you have created your tournament, you will find your self on the main page for the tournament. If you selected "Hidden" access, you can copy the url from your browsers address bar and share it with your friends. As the TO, you can edit various settings for the tournament. In the bottom-right corner of the banner image, is a button labeled "Manage tournament". Clicking on this will open up a menu with various options. Selecting "Edit configuration" will take you to the same page as when you initially created the tournament, allowing you to revise any settings you like.
Changing the banner image
Your tournament page has a banner image at the top. If you wish, you can replace this with your own image. To do so, click on "Manage tournament" → "Edit banner". You can now upload an image or delete the existing, if you change your mind. It's recommended to make the dimensions of the image a fair bit wider than it is tall to look best on the page.
Adding participants
There are two ways to add participants to a tournament. Either the individual players sign up themselves or the TO can add them in (Called a managed warband). These two methods can also be mixed. If the players sign up directly, they can submit roster and scoring results for matches, which makes everything easier for everyone involved. However, we recognise that not everyone wants a digital-first approach to a tabletop event. As the TO, you can select the menu option "Manage tournament" → "Add warband". This presents a page for you to input details about the participant. This is similar to the page that a player would see if navigating to "Join tournament", except it also contains a field for the display-name and steam-name. You can add any number of warbands this way.
When adding a warband, you can select the faction and enter the roster in text form.
You can also click on "Switch to builder" to activate the advanced roster builder. This will allow you to add units, assign deployment groups and more. It also validates the warband according to the rules configured for this tournament (See Roster constraints). If the simple text field + dropdown are used, no particular validation is done to the roster format, although suggestions are given on how to format it.
By default, rosters/factions are hidden for other players until the tournament starts (See Runtime control). The tournament main page will instead show an icon depicting whether a faction/roster has been provided or not. Players can edit their roster freely any number of times until the start of the tournament. Note that as a TO, you have extended privileges and can peek at the participants rosters before time.
Note that if you selected "Require invitation to join" (See Permissions), players will need to enter a valid invitation code to proceed with signup. As the TO, you don't need to enter this.
Manage invitations
If your tournament requires invitations, you can manage the invitation codes under "Manage tournament" → "Manage invitations". This will show a list of all the invitation codes you have created for this tournament (None initially). At the top of the page, you can click on the option "Create invitation" to create a new code.
This option is only available, if you have enabled "Require invitation to join" under tournament configuration. You can change this by going to "Manage tournament" → "Edit configuration" and scroll down to the heading "Permissions".
Note that Wartally doesn't mail these invitations to the players. You will have to copy the code and do so your self. Remember to also provide a link to the tournament page, so they can find the right place to sign up.
Dropping players
There are two ways that you can remove a participant from your tournament. If the signup was a mistake entirely, you could go in to the warband, click on "Edit warband" and then on "Delete warband". This will completely erase it from the system.
Less finite, is the "Drop player" option. This is what you should use for players that were signed up, but never showed up to the event; Typically when they call in sick or the like. Functionally it amounts to the same, but a dropped player will still be visible on the list of participants, just striked out.
To drop a player, go in to their warband, then click on "Edit warband". At the top of this page, there is a checkbox with the label "Drop player". Check this and scroll down to the bottom of the page and click on "Save changes". To undo, just do the reverse.
Votes
You can optionally add votes to your tournament. This is commonly used for voting on best painted warband or best sportsmanship, but you can pick any number of votes for anything you wish. Every player will get one vote and the winner will be the one with most votes.
To add a vote, go to "Manage tournament" → "Manage votes". This page will display you votes for this tournament (None initially). Click on the top option "Create new vote", then fill in the title of your vote. Be descriptive, but also try to keep it relatively brief. Per default, voting is open once the tournament begins. You can optionally pick a later round, at which voting will open.
Once at least one vote has been added, they will appear on the tournament page, near the bottom. When voting opens, participants will be prompted to cast their vote. Results are hidden until the tournament ends.
Battle plans
While optional, you can specify which battle plans are used for each round. Doing so makes it easier for your players to remember what they are playing, having everything in one place, so it is recommended that you do so.
You can either enter the battle plan when you start a new round or you can do it in advance. If you are preconfiguring, the information will not be public until each round commences.
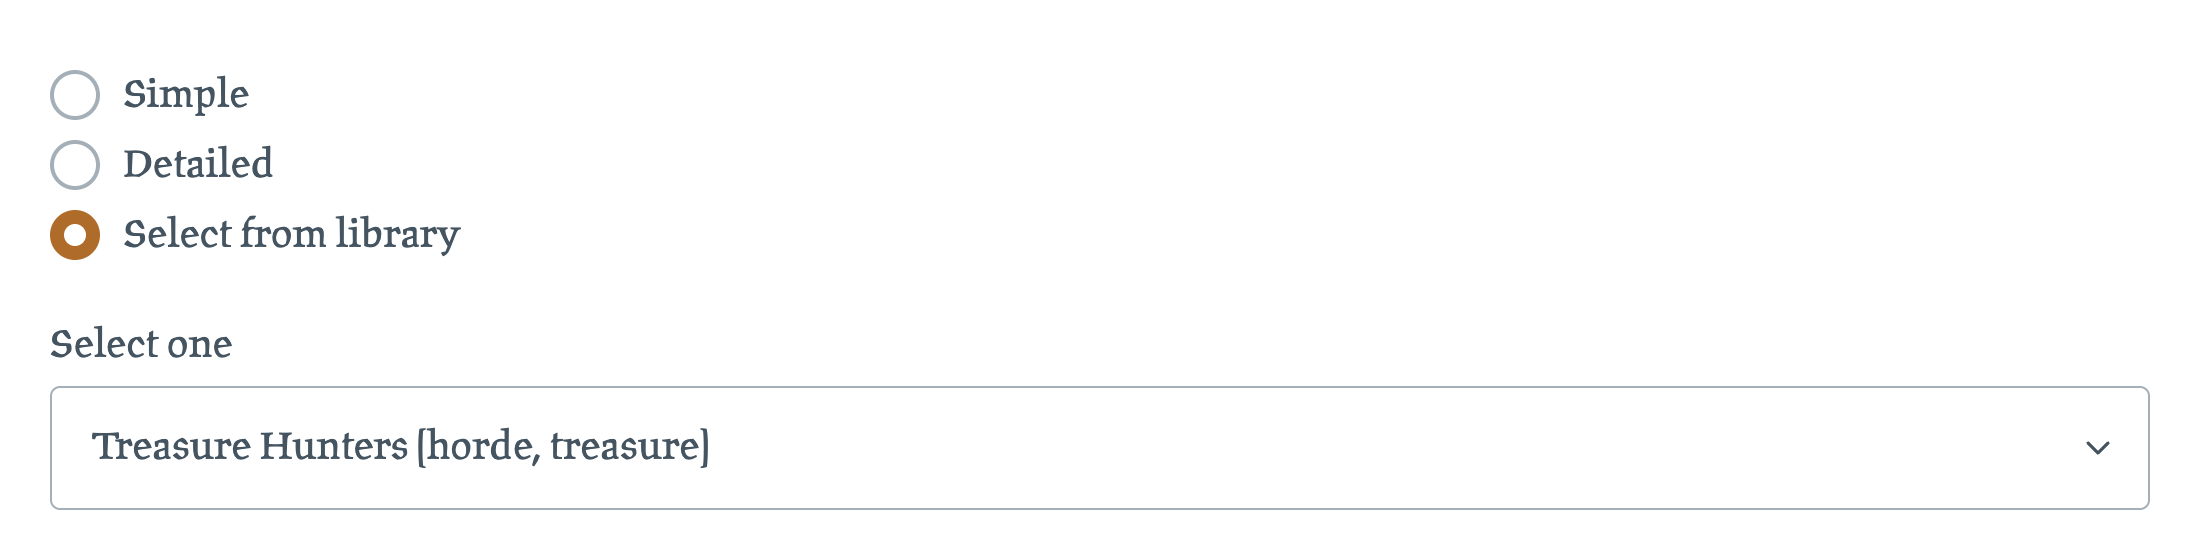
To pre-configure battle plans, go to "Manage tournament" → "Manage battle plans". This will show a list of one row per round in your tournament. If you click on one, you will come to a page where you can pick between 3 types of battle plans. "Simple" is just a title. If instead you pick "Detailed", you can further add a deployment map and a description text. Finally, you can select "Select from library" to pick among a number of standard battle plans. These also have deployment map and description. In the list of available standard battle plans you will see various tags (Such as elite, treasure) which describes the style of battle plan, making it easy to find something fitting.
The battle plan library can also be browsed here.
Running the tournament
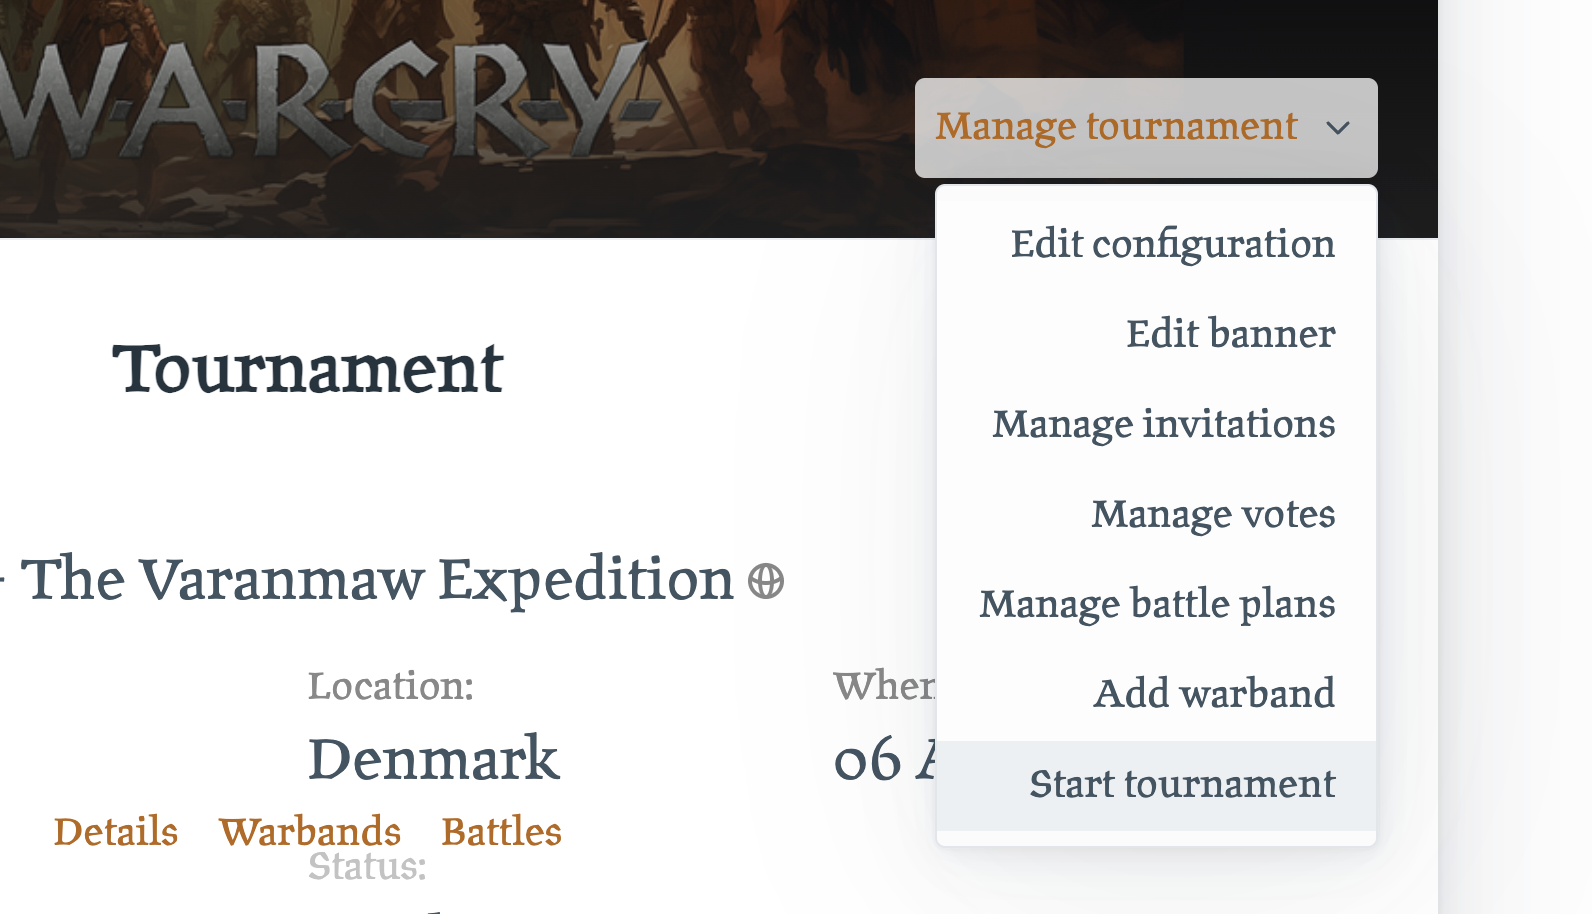
When it is time to start the tournament, go to "Manage tournament" → "Start tournament". If you have entered a date for the event, you will also get a prompt to do this at the top of the page. Before doing so, you should inspect all rosters to make sure they are filled in and valid.
Clicking on "Start tournament" will take you to the matchup page, where you will get presented with the matchups, before committing the action by clicking on the "Confirm" button. At the top of the page, you will be prompted to change the runtime settings to "Running event mode". It is highly recommended that you do so, as this will make rosters public and lock them for editing. New signups will also be prohibited.
If you have not already configured battle plans, you will get the option to enter a battle plan for the first round here; Otherwise you will simply see the previously selected choice.
Pairings are generated by Wartally and are usually entirely random on the first round (Except if you use the Grudges and truces feature). You can manually alter the matchups, if you want. Note that if you have an odd number of participants, one will be selected to sit over.
Once you press "Confirm", the battles will be created and all participants should be able to see their matchups.
Scoring battles
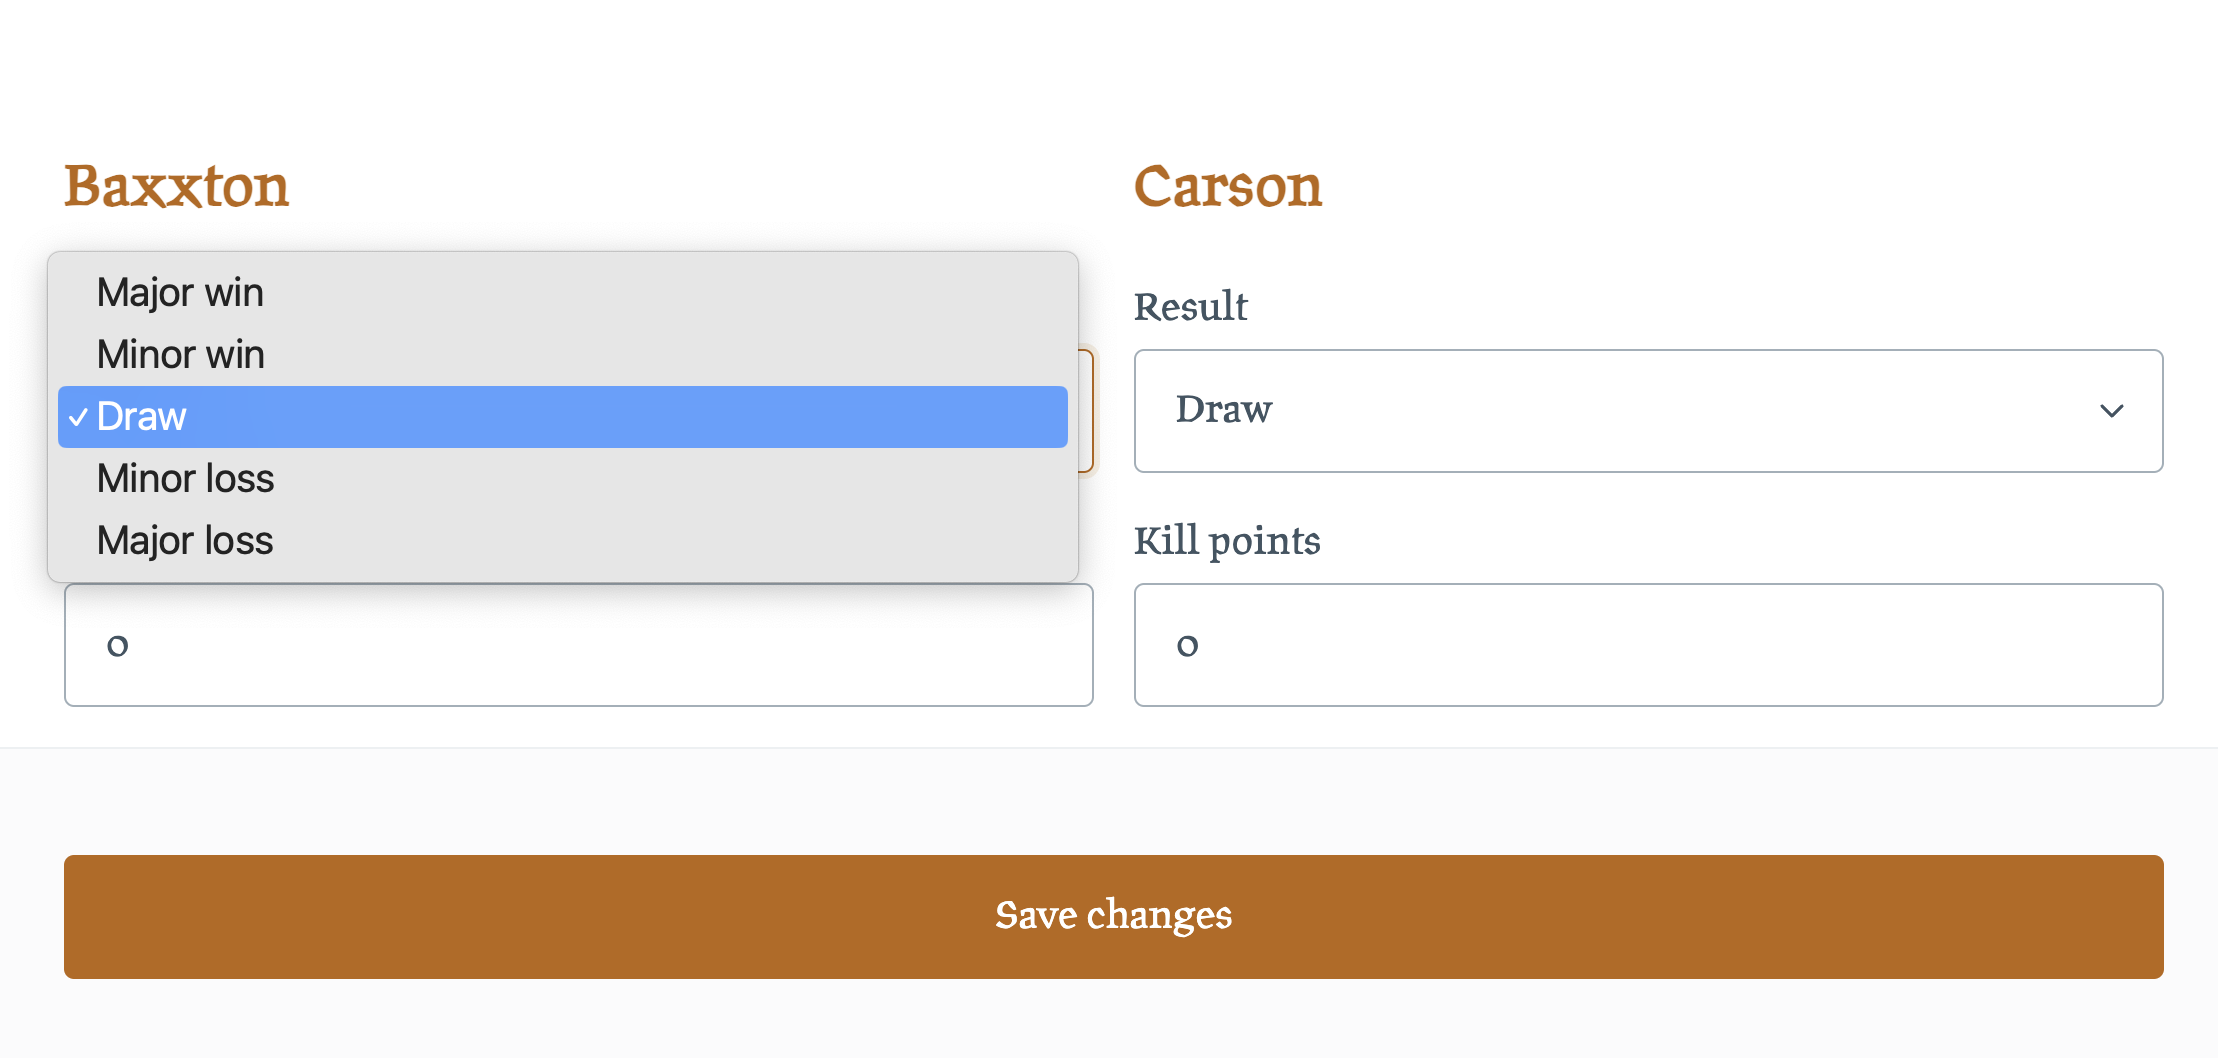
When a new round is created, the battles for the round are now on display on the tournament page. Participants can click in to the battle and enter results of the match. Any of the two opponents can enter results, and the TO can naturally also do so.
The battle page contains information about who is playing, what table they should use as well as the battle plan (if entered). The scorecard determins how results are entered.
As long as the round is open, players can go back and revise their results.
Starting subsequent rounds
When all battles for a round has been scored, you will be prompted to create a new round. The process is much like when starting a tournament, except that you won't be prompted to change the runtime settings.
Note that while you can still change pairings manually, it is probably not a good idea to do. Wartally has used a swiss-ranking algorithm to match participants.
When a new round is created, the battles of the previous round is locked for editing. As a TO, you could still edit results, but players will not be able to.
Ending the tournament
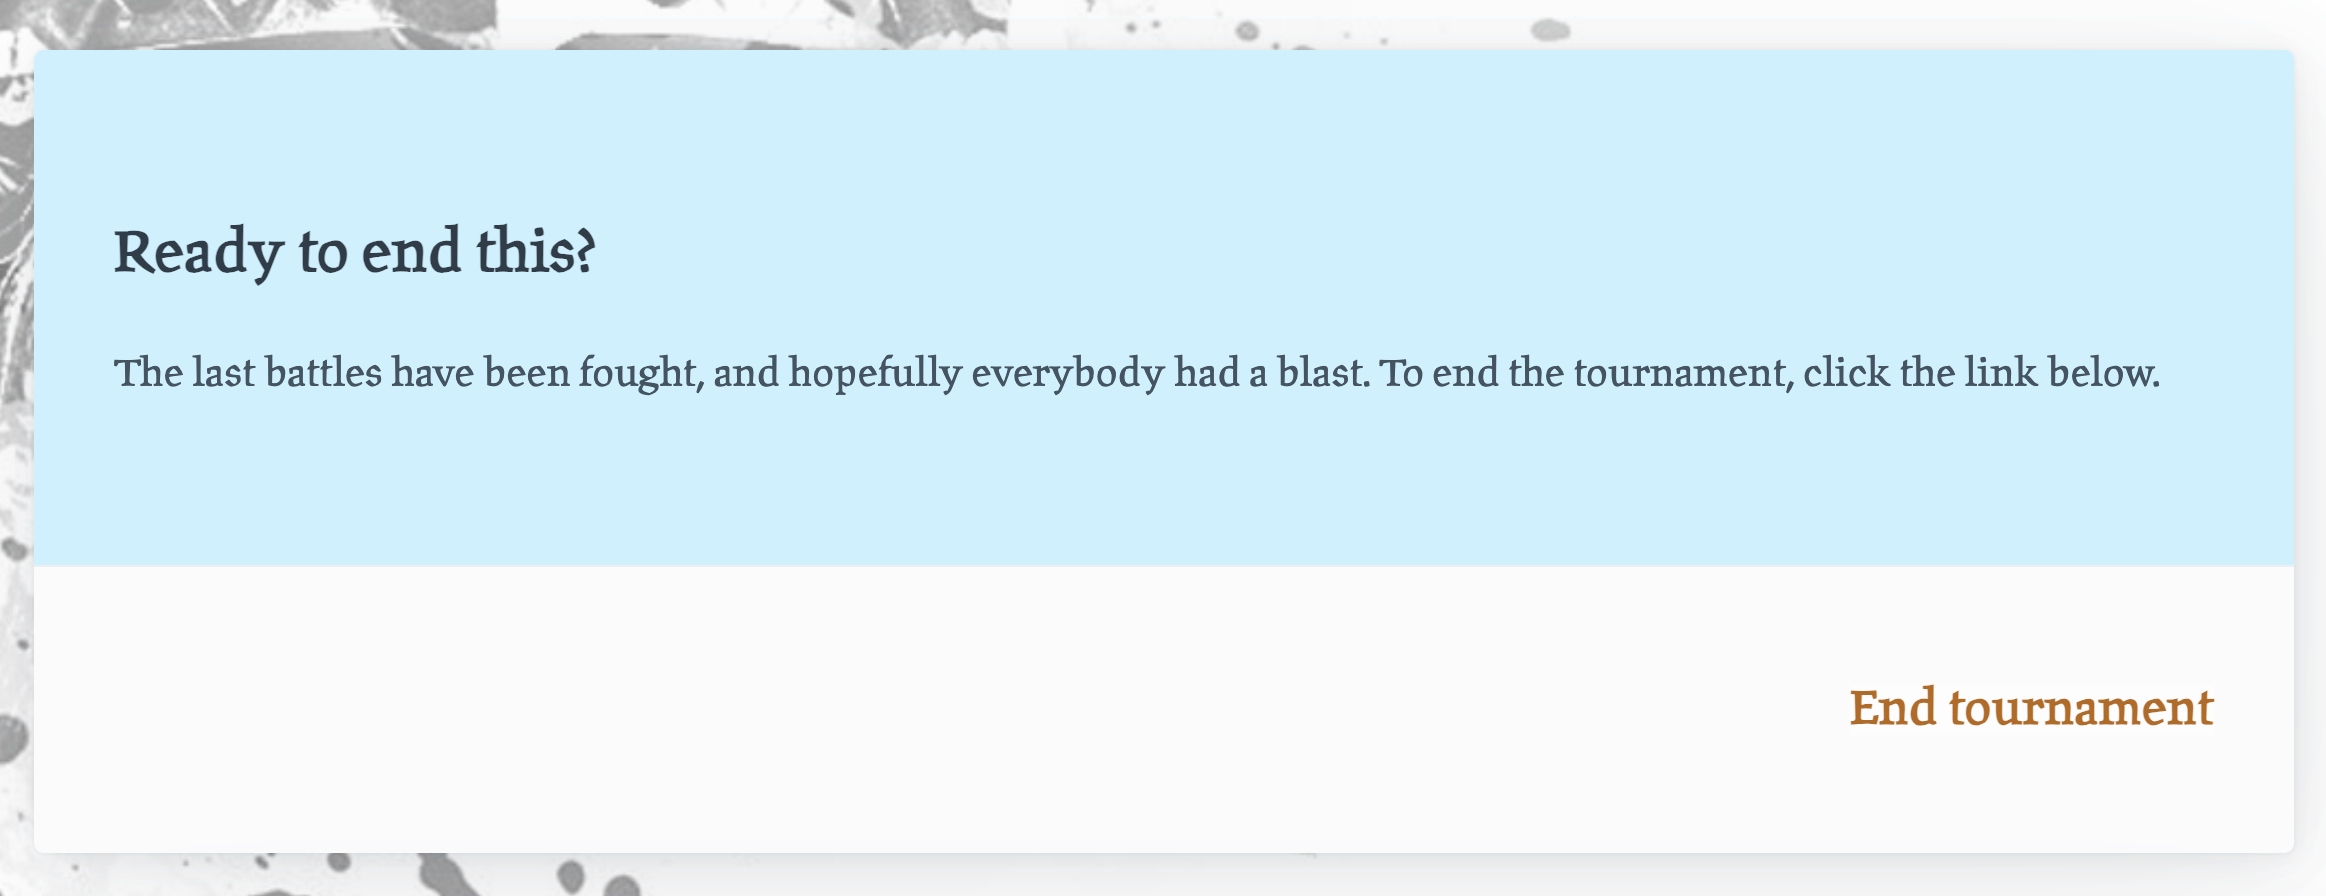
Once all battles have been scored for the final round (As determined by the tournament basic settings), you will be able to end the tournament. There should be a prompt to do so at the top of the page, or you can go to "Manage tournament" → "End tournament".
By ending the tournament, you lock battles for the last round and close any votes, if these are used.
TTS integration
Wartally integrates with Tabletop Simulator (TTS). If both participants have entered their steam-name under their account (Top menu), the TTS Warcry mod will automatically find the battle on wartally. They can then load the roster into TTS and when the battle is over, they can submit score directly, without having to go to wartally for it.
If warbands are managed by TO, you will have to explicitly enter the steam name in the supplied field for the warband. This can also be used to override the users own steam name, useful for substitute players. Only the TO has access to do this.
Note that TTS doesn't know how to distinguish between minor and major wins. As such, it makes little sense to pick any scorecard other than 5/3/1. If you do pick Major/Minor scorecard, battles will simply be registered as either Major win, Major loss or Draw.
If you have secondary points as the tiebreaker, note that TTS will use kill points only if you name the field "Kill points". Otherwise it will pass victory points as the secondary score.